Photobucket
Photobucket
Showing posts with label cosmetics. Show all posts

Tuesday, May 29, 2012

maniCURATIVE: Sally Hansen's Salon Effects Real Nail Polish Strips


I've been dying to do a maniCURATIVE posts for ages, and thought now would be the perfect time to do one on Sally Hansen Salon Effects Real Nail Polish Strips, which I use at least once a month and love to pieces!!! So....... let's get started! Here's what I used:


Step One: Opi Ridge Filler Base Coat (I'm using this for the first time, since my favorite base coat, Essie Fill the Gap! seems to have dropped off the map!)
Step Two: Sally Hansen Salon Effects Real Nail Polish Strips (In  Haute and Naughty .. plus a surprise!)

The first thing I do is assemble everything I need on one surface. I lay the strips out for easy access, which makes it easy to grab and use when I'm ready to.


Haute and Naughty (pictured above) is not the only shade I ended up using, but since the second color was a last minute decision, I didn't have it ready on hand.

Anyway, I started with applying a single layer of the base coat, O.P.I's Ridge Filling Base Coat... I like so far. It dries very fast, which is always a plus!


Once the Base Coat is completely dried, I find the best sized strip to fit my nail bed. Once the best one has been selected, I peel the clear protective plastic cover.


Then I peel the nail polish strip itself from the backing paper.


I'm now ready to apply. So placing the strip against my cuticle line, I slowly press the strip to my nail, rubbing and smoothing the strip along my nail, to ensure it will bond to my nails.


Once the strip is secured to the nail beds, I gently run it across the tips of my nails and when I'm confident the strip is exactly the way I want it, I gently pull the excess strip away. If this is your first time using the strips and you're afraid of going overboard, feel free to use the handy file included with the kit to file away the excess.


Once the first nail is done, I repeat the process on the other nails. At this point, I decided it might be fun to try two different shades, so in addition to Haute and Naughty, I also used Mod About You on the ring fingers of my hands.


I thought that the pattern would be a nice pop of color in contrast with the dark and dramatic shade.


Once all the strips have been applied, this is what it looks liked...


Now, the last steps is to fill away any jagged pieces or excess to smooth and apply the top coat. I love Seche Vite because it is super fast drying, which means in a few minutes... I'm done!!


Have you tried Sally Hansen Salon Effects Real Nail Polish Strips before? What has been your experience? What is your favorite shades?

Tuesday, March 22, 2011

maniCURATIVE: Essie's Resort 2010 Collection - Turquoise & Caicos

cu·ra·tive (kyr-tv) adj.
1. Serving or tending to cure.
2. Of or relating to the cure of disease.

ma·ni·cu·ra·tive (mn-kyr-tv) n.
1. A cosmetic treatment of the fingernails, designed to lift your spirits and cure what ails you.
2. The newest from Miss Moon's Musings, dedicated to nail polish color.


I've been silently stalking this color since last year, concealing my drool whenever I'd spot it on some of my favorite bloggers. Primarily because rocking blue nails is not so daring and unique for me.

I gave in a few weeks ago, when I spotted the shade at a Duane Reade in Manhattan (Okay, why is it that some DR's are GREAT for cosmetics, and others are completely whack!?!?!?) and I scooped it up in record speed!!!!! Seeing as this past Sunday marked the Spring Equinox, I thought it was a fitting occasion to try out the new color for the week!!


Step One: Fill the Gap! Smoothing Base Coat
Step Two: Essie Resort 2010 Collection - Turquoise and Caicos (#720)
Step Three: No Chips Ahead Chip Free Top Coat

I am not a card-carrying member of "Team Essie", btw.... I've been using Fill the Gap! for months now and its the dopest base coat I've ever used!! I'm trying out No Chips Ahead for the first time, hoping that it will work just as well.

Here are the results:


Here's the just applied & drying (haven't cleaned it up yet...lol!) color. I must say that this color is unlike any shade of blue I've worn before... and frankly, I'm LOVING IT!!! I am digging that the color is this vibrant by natural light only!

To get this color, I used two coats of color and two coats of top coat... I am thinking for now on, I will only use a single coat of the top coat, as I did experience some slight bubbling along the surface of my nails... which is a major drag. Only time will tell if I experience any chips. I will be sure to post an update.


For a Miss Moon's Musing Video Extra to this post, be sure to check out my YouTube channel!!! Are you in dire need of a maniCURATIVE?!?!? What's YOUR go-to color for Spring?

Friday, February 18, 2011

And Now...A Makeup Moment: M∙A∙C Wonder Woman Lip Sticks


So I was unable to attend the launch party here in NYC for M∙A∙C's newest collection (Had to work and couldn't get out early enough), but my good friend, my Pirate Sistah, Bad Ass Blogger herself... Jay the Bohemian Diva was in attendance, and her reporting of the event had me very excited to check out the collection myself.

While M∙A∙C's Wonder Woman Collection offers a myriad of goodies for the eyes, face and nails (There's even a KICK ASS Utility Belt Brush Set for your Eyes and Face), I was super excited about their Wonder Woman Lipstick shades!!

From left to right: Heroine, Marquise'd, Russian Red, and Spitfire.

Here is a closer look at the swatches:


Heroine (Brown bronze)


Marquise'd (Sandy cream peach)


Russian Red (Intense blush-red)


Spitfire (Bright creamy magenta)

Come pay day, I knew that one of these colors will be mine!!!! While I liked all of the shades, there was only one that made me go "OOOOOOH!!!!". Can you guess which one? Hmmm...?

Okay, This is what I bought:


I chose Spitfire... I thought that this magenta shade would be a fun, flirty look for the spring.... And because I've been needing a mirror for my purse, I also got....


The Wonder Women Invincible Mirror... how dope is that?!?!?

Here is me rocking, Spitfire. I must admit, immediately after making my purchase, I had a bit of buyer's remorse, thinking I should've opted for Heroine (Which is more of a shade I am used to wearing!) I still may get that color, but I really really like how I look in Spitfire!! I tried it on to take pictures for this post and the color immediately perked me up. I look forward to rocking this shade all spring!!


*FYI: I lined my lips with M∙A∙C's Cremestick Liner in Portside - a color that works with most of my lip shades and I love to DEATH!!! Thank you, Chris for taking the picture!***

Check out the M∙A∙C Wonder Woman Collection at http://www.maccosmetics.com/

Friday, September 24, 2010

And Now...A Makeup Moment: M.A.C's Venomous Villains Collection!! (Pt. 2)


Picture courtesy of Jay the Bohemian Diva

So Tuesday night, I was super duper exhausted when typing about my first visit at the MAC store to check out the Venomous Villians Collection, so I decided to create a two-part blog to cover the event. As I wrote in Part One, this was my first time ever visiting a MAC store, and looking around at all the goodies MAC had to offer was ker-ay-zee!!!


One cool, fun part of the event is that we had the opportunity to dress up like our favorite Venomous Villain!!!!

Me with the Evil Queen from Snow White. She's throwing shade and I'm throwing it right back at her! LMAO


Here's Jay, dressed up like Cruella.... doesn't she looks totally Diva-licious!?!?!? From some odd reason, Cruella's costume translated into Old Black Church Lady the moment I put it on!! LMAO


"And now Sister Moon will read from First Corinthians......" Hahahahahahahahahahahahaaaa!!

So after Jay and I had our fill of everything the MAC store had to offer, we parted ways and I headed back to Brooklyn with my lovely black bag full of goodies. Here's what I got:


Violetta (Amplified) Lipstick - Maleficent
Hot House Lipglass - Evil Queen
Magenta Lip Crayon (For lining! Not part of the Venomous Villians Collection)


This is Violetta Lipstick. It's a cute tube, but I am thinking in hindsight that I should have taken a picture of the ACTUAL color!!!


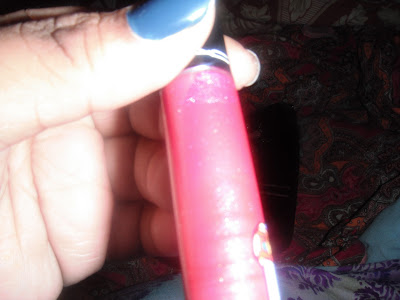
Here's the Hot House Lipglass.... I actually took a picture that shows the color this time around! LOL


So that's what I purchased. And I am really enjoying the colors and like Jay said in her post about the event, Girly Girl Time: M.A.C.'s preview of the "Venomous Villians Collection", I am a convert. LOL

Wednesday, September 22, 2010

And Now...A Makeup Moment: M.A.C's Venomous Villains Collection!! (Pt. 1)


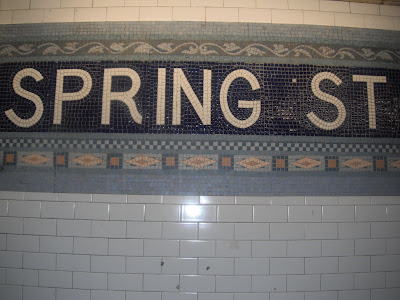
Receiving an invite to view a new collection from M.A.C is an invitation that a cosmetics newbie like me couldn't resist. So after work, I was on the 6 (Like J-Lo) Spring Street bound to meet up with my good friend and Pirate Sistah, Jay (Badass Blogger of Jay the Bohemian Diva) to check out the line, inspired by Disney's Baddest Villains.


This occasion was also auspicious because it was my first ever visit to a M.A.C store... I must admit, between the crowd of makeup lovers and the huge selection of makeup to look over, I was a bit overwhelmed, but very very excited to check out the collection!!


The line features new shades inspired by The Evil Queen (Snow White), Maleficent (Sleeping Beauty), Cruella Deville (101 Dalmatians) and one of the newest villains, Dr. Facilier (The Princess and the Frog). Guests were invited to sample the collection, while handsome waiters brought trays filled with alcoholic goodies and snacks for all to enjoy!


This waiter in particular was told that he looks like a Ken Doll... it was meant as a compliment! LMAO


These little brownies had a cayenne pepper frosting that was actually delicious... and this waiter was especially cute and very sweet!!

I was immediately drawn to the makeup inspired by Maleficent and The Evil Queen, and was very lucky enough to have the fantastic people at M.A.C hook me up with a sample


This is me after the application of the "Revenge is Sweet" (Maleficent) Lipglass.I went back and had it redone using the Violetta (Maleficent also) lipstick with the Magenta Lip Pencil.


Jay had her make up done was well. Be sure to check out her blog in a few days for more pictures and her take on the night!


It's after midnight and I have to go to work in the A.M., so I will end part one of this blog with this ADORABLE butterfly ring I was wearing to the event. It's unfortunately not available online, but I picked it up at my local Lane Bryant store.

Be on the look out for Part Two in the next few days to see more fun at the M.A.C store, and to find out what I snatched up!!